Installing TidaLuna
Download the latest installer build from the TidaLuna Installer Releases. Then follow your platform guide:
- Installing on Windows
- Installing on Linux
- Installing on MacOS
- Legacy installer guide (v3.0.0 and below)
Preparation
Make sure the TIDAL desktop app is installed on your system. If you don't have it installed yet, you can download it from the TIDAL website.
INFO
If you're on Windows, make sure you are NOT using the Microsoft Store version of TIDAL, as it is not compatible with TidaLuna.
If you aren't logged into the TIDAL app yet, we suggest you do so now before proceeding with the installation of TidaLuna.
Before you start the installation, make sure to close the TIDAL app if it is running.
Installation Steps (GUI)
- Launch the installer app/binary you downloaded for your operating system.
- In the installer window, select your preferred release channel and version.
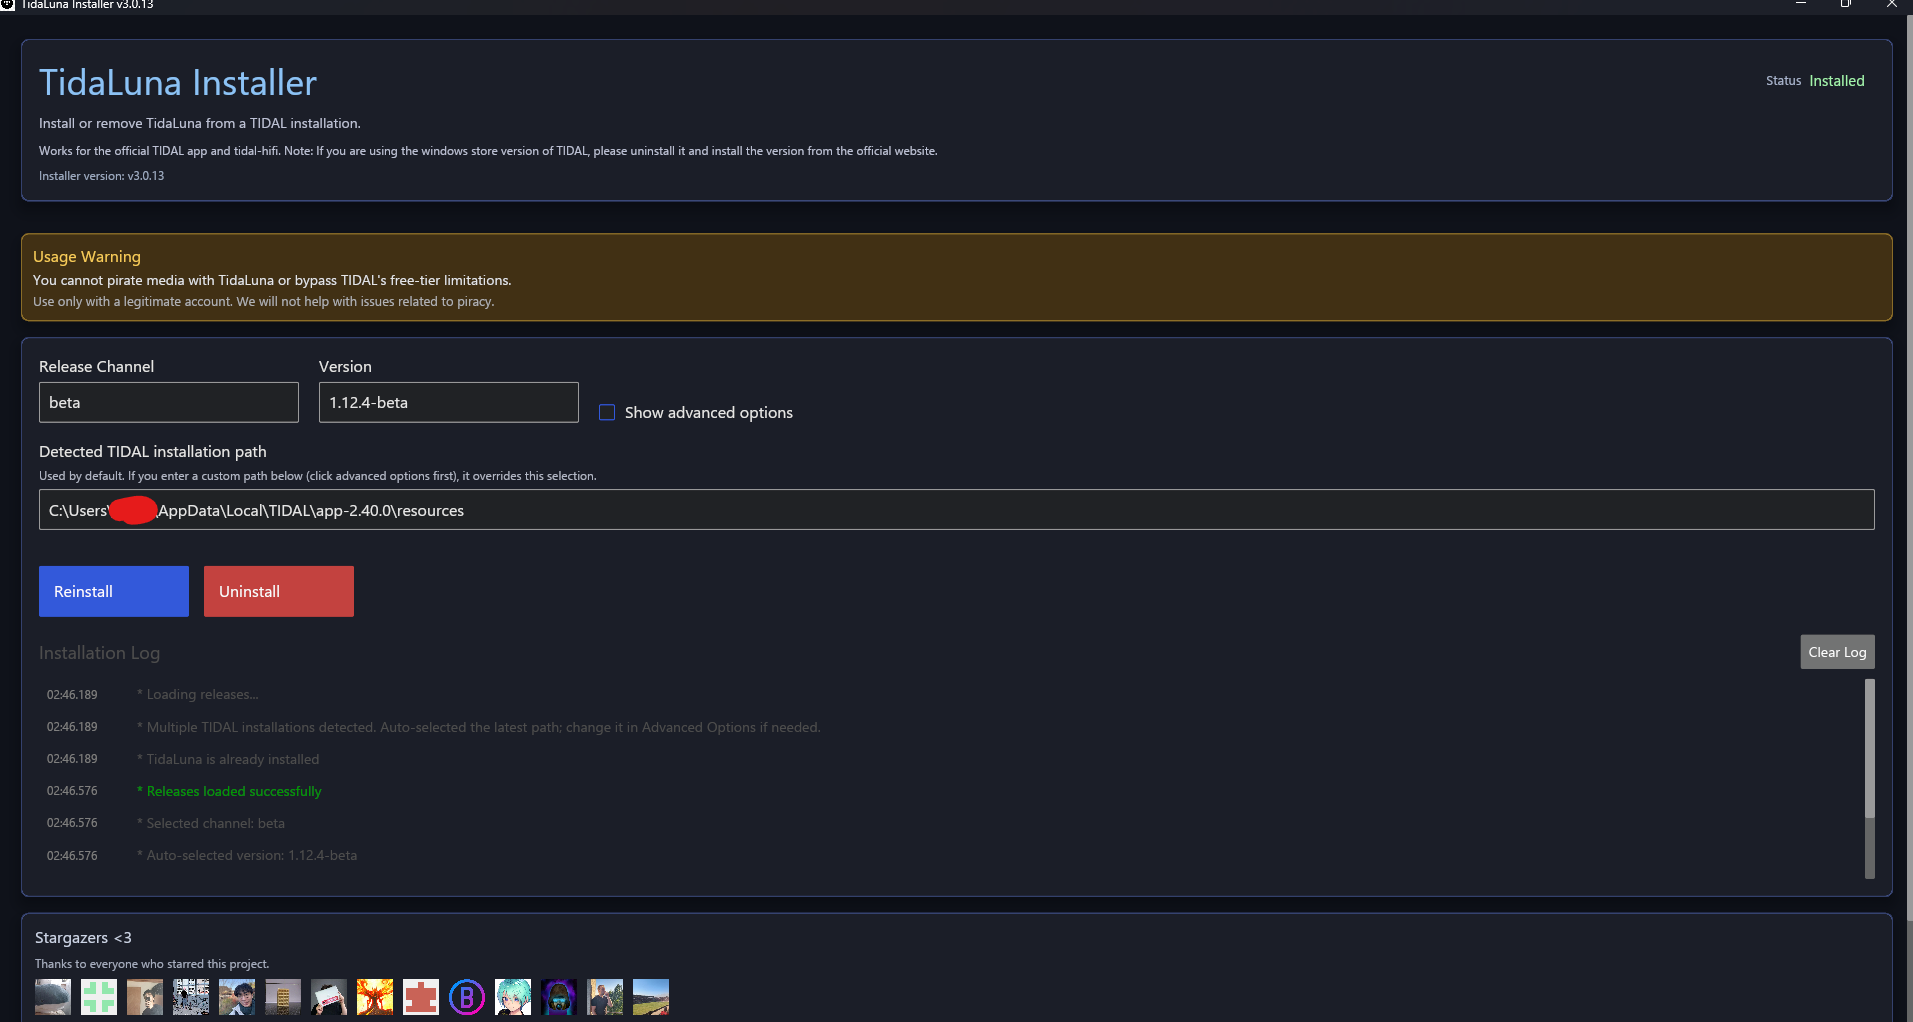
- Click Install (or Reinstall if TidaLuna is already installed).
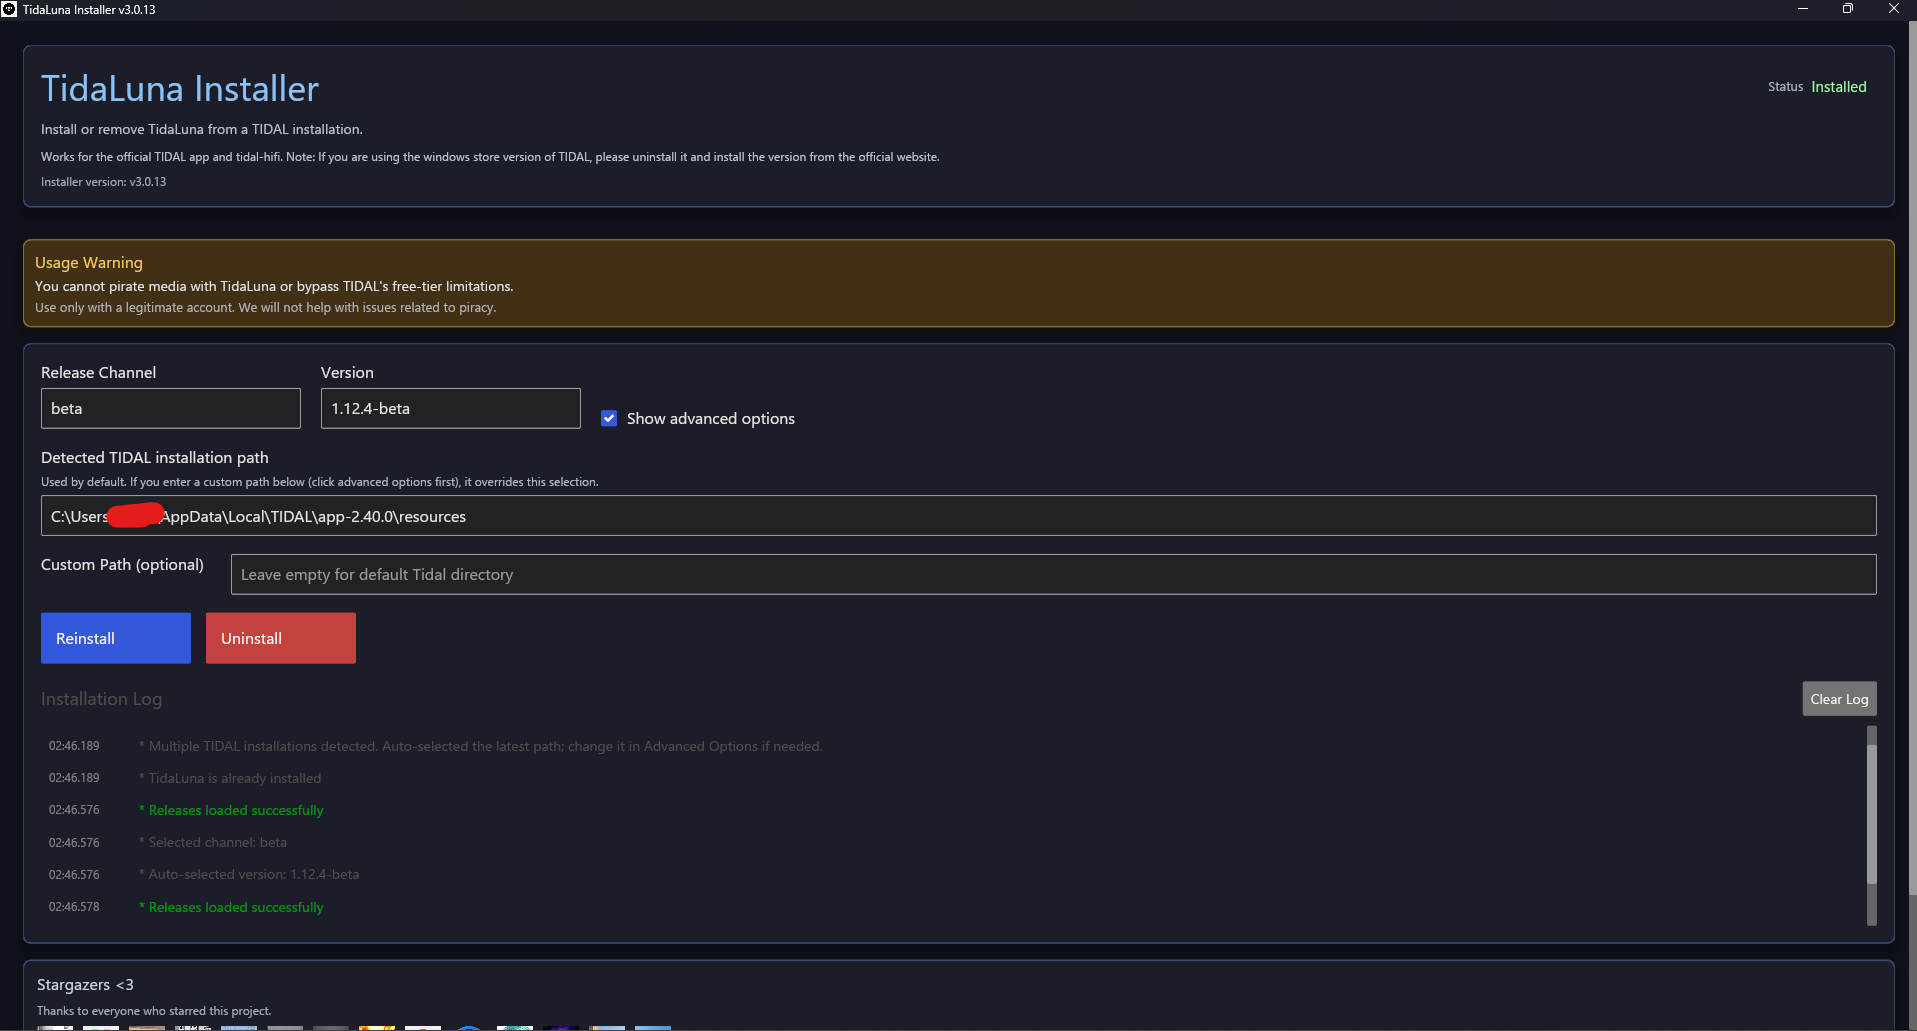
- If needed, enable Show advanced options to set a custom install path.
- Wait for the installation log to finish.

- Open TIDAL. You should now see Luna Settings in the menu.
The installer automatically handles:
- Detecting existing TIDAL installations
- Removing previous TidaLuna/Neptune installations
- Downloading and extracting the selected version
- Applying modifications to TIDAL
- Signing the application (macOS)
Installation Steps (CLI / headless)
CLI mode is available for automation and advanced usage.
Important: --headless must come before other CLI options.
# List available channels/versions
./tidaluna-installer --headless --list-versions

# Install latest stable
./tidaluna-installer --headless --install

# Install specific version
./tidaluna-installer --headless --install --version 2.1.17

# Install to custom TIDAL resources path
./tidaluna-installer --headless --install --path "/path/to/tidal/resources"

# Uninstall
./tidaluna-installer --headless --uninstall
On Windows, replace ./tidaluna-installer with ./tidaluna-installer.exe in PowerShell.
What to do next
Updated screenshots to add
Place screenshots in /assets/images/ with these names:
installer-ui-main-v3.png— Full main installer screen showing channel/version selector, detected TIDAL path, and Install/Reinstall buttons.installer-ui-log-v3.png— Installer with the log panel visible during or after install.installer-ui-advanced-v3.png— Installer with Show advanced options enabled and custom path fields visible.mac-perms.png— macOS Privacy & Security -> App Management screen showing Terminal enabled.